Monday, April 25, 2011

Sharpie Harley Davidson


Where to start, where to start. So...... very very late last Monday night (roundabouts midnight) I was woken up by a phone call from Jason of Infidel Customs. The reason for the late night call was not actually to wake me up, but rather to commission me for a Sharpie paint job on his Harley Davidson. The catch (since there always is one) was that it had to be done in time for a Thursday photo shoot. That's 2 days to start and complete the job. And in reality, it was even less since my day job consumes all waking hours. The other catch was that it had to be done at the location of the new shop, and also done on the bike (instead of disassembling it first). So this was one hell of a task with a number of obstacles. Getting up to Hagerstown from Gaithersburg with enough coffee to keep me going was difficult enough... but I love a good challenge. The first night I arrived around 11 pm. I got 1 side of the gas tank done and 1 side of the rear fender... so 1/2 was a good stopping point for day one. I got home about 3:30 am. Day 2 I arrived a little earlier, closer to 9:30 pm and got around the other side of the rear fender and gas tank. Day 2 definitely went alot smoother and faster. And around 2 am I was done. Sleep deprived with a drive ahead. The bike was completed and it turned out freaking cool. Jobs like this are hard to tell how it's going to turn out exactly. You don't really know anything until you're done. Airbrushing and pinstriping are about the same way- You can envision everything, but until it's done you really have no idea. Free handed artwork tends to be like that. Risky. But that's the excitement in it. Not to mention the rather individualistic look when it's done.

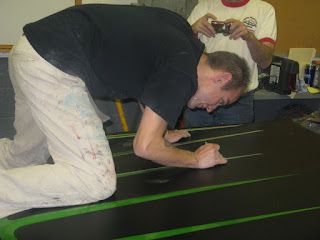
This job was done using Silver Sharpie Markers over the existing gloss black. All the artwork was done freehand with no pre-planning what so ever. The materials I brought with me to do the job was a pack of markers and an Ipod to keep me moving though the late hours. These particular markers can be tricky to use for many reasons. Doing parts on the bike means you have to try and keep the marker always feeding downwards... which means you have to contort your body a bit to position yourself properly to get the markers to operate properly while maintaining nice lines. Also... after a little bit of use, the felt tips begin to 'break'... this leads to a change in line thickness and what's called 'pushing'. The trick is to pre-break the tips a little bit to try and keep things consistent from marker to marker.

These jobs are a blast to do. I hope to be doing more in the future!

So I've got a few Hotwheels... big deal.

As I'm making preparations to move west, it's necessary to go through all my junk and figure out whats what. To see what'll fit in the car... what'll fit in a truck... what can be given away...and whats trash. For me, the bulk of what I own is in 1/64th scale cars. But not just a few... I mean thousands. And not all of them are your typical Hotwheels 1/64... some are bigger and some are stranger. This is my retirement fund so it has to go with me. It's always fun to sort through some old stuff and go "oh wow, didn't know I had one of those". I did that over and over again. It was fun! The hotwheels in the deep tubs are stacked about 8/9 deep... the thinner boxes have hotwheels stacked 4/5 deep. The luggage carrier has some of the odd shaped packages but still managed to hold a whole lot of toys. I'm still finding hotwheels around the house that have been accumulated over the last couple years.

It's not an obsession.


I think...

Tuesday, April 19, 2011

The most recent of Happenins'


This past Sunday I had a customer come by to get his 2012 Fiat 500 pinstriped. All he wanted was a simple red stripe that went down the sides and around the back. After the pins on the Caddy, these long lines we're a breeze. The stripes were not pre-taped nor did I use a magnet as a guide. Pure freehand. The red really went well with the brake calipers and the accent ring on the wheels. The next task of that day was to remove and repaint the wheels on the Caddy. Jake helped me get the car on jack stands and break all the lugs free (since many of them seemed to be rust welded on). Prepping the wheels was a dirty job, but had to be done. Next, I got the wheels onto the booth floor and covered them in plastic... cut out the wheel section... then taped the edge of the plastic to the edge of the tire. Clean a little more, then hit em with flat black. Done. And speaking of flat black... I also have a set of motorcycle parts I'm workin on here that got flat blacked and are waiting for pinstripes. Amongst everything else that I'll be workin on in the next few days, I'll be trying to get the stripes done up on these cycle parts. Busy time for the pinstripes... and everything else... high five!
Lyrics can mean things too!

I'd like to share the lyrics to a song that I've liked for a pretty long time. I first heard the song and the band in middle school... and today the song is always playing in the back of my head. Might not mean anything to anyone else, but I love the long. The song is Carousel, by Blink 182. It was on their 1st, 2nd and live album (best version). The beginnings of the song were created in the very first jam session of Tom and Mark ever. Were talkin early 90's. Simple as it may be, the words have always held meaning to me.

Carousel:

I talk to you every now and then
I never felt so alone again
I stop to think at a wishing well
My thoughts send me on a carousel

Here I am standing on my own
Not a motion from the telephone
I know not a reason why
Solitude's a reason to die

Just you wait and see
(Just you wait and see)
As school life is a
It is a woken dream
Aren't you feeling alone?

I guess it's just another
I guess it's just another night alone

Now as I walk down the street
I need a job just to sleep in sheets
Buying food every once in a while
But not enough to purchase a smile

A tank of gas is a treasure to me
I know now that nothing is free
I talk to you every now and then
I never felt so alone again

Just you wait and see
(Just you wait and see)
As school life is a
It is a woken dream
Aren't you feeling alone?

I guess it's just another
I guess it's just another night alone

To here the song in its live album version awesomeness, go to:
http://www.youtube.com/watch?v=urIXDF7KbOs

Friday, April 15, 2011

Custom paint on the Cadillac (aka Cattle Smack) Part 3


Yes, there's more Cadillac goodness to be had. The design for the trunk was left up to me... the only request was to make the "Sacred Heart" the center piece of the design. I got that squared away 1st so I could work around it. Once it was done, I mixed up a couple different greens to use as the initial color for the trunk and decided against it completely. The green looked ok, but just didn't provide enough front-to-back contrast to me. I knew I was going to use the same Ivory that was used to outline the scallops so I sisn;t think it necessary to just plain duplicate the color layout. So instead I went with a nice classic- Process Blue. I think the blue and green work well together, but on seprate parts. I laid the blue part of the design out 1st, then came back in the next day and chased my ideas around with ivory. I wanted to make the design partially classic looking, and partially more of the complex intertwind designs I like doing. Once done, the 2 colors looked great against eachother. I moved the car outside and snapped some photos since the weather was decent. The green glows in the dark and the car looks bad ass at night. The last task on this job is to black out the wheels. It will kind of finish out the look, I think. I'll post some pics when the car is in it's Finished stage.

Wednesday, April 13, 2011

Custom paint on the Cadillac (aka Cattle Smack) Part 2


Once the Caddy was cleaned up and parked in a comfortable space, it was time for the pinstriping to happen. Having not done many long line jobs before, this was both a huge challenge and a great learning experience. 1 Shot Ivory was the color used for the outlining of the scallops. Every line was pulled 100% free hand with a Mack 10 series 00 Pinstripe Brush. No guideline was used, no tape to follow, no magnet to ride. Nothing. Which made it that much more, fun, shall we say. And striping on this flat black was like trying to pinstripe a chalk board... very not smooth. I started with the hood because I thought that would be the easiest to get started. Wrong. I'm a bit short for the kind of reach necessary to pull the lines on the hood the way I wanted to. After I'd had enough of that battle, I moved onto the scallop on the passenger side hood edge, and then to the remaining scallops on that side from top down. The sides ended up being a bit easier (since I'm short) but still challenging (since I'm learning). But everything came out great. I resumed working on the hood so that i could get at least to a nice half way point. After several different variations on technique I decided i just needed to get on top of the hood and work like that. So I did. I held my body weight with my left arm and pulled the stripes gently with the right. And magically, cameras appeared! Oh we have fun. At some point I found that the best way for me to get the left side stripes was to pull it with my left hand. The first day of pinstriping ended shortly after midnight when my body couldn't keep up anymore. Day 2 of pinstriping went waaaaaaaaay better, smoother, faster. After a little sleep I was pulling longer lines with better seams and making very few errors that required correcting. When I was done Jake and I measured out the length of each stripe and added them all together. The total dinstance of pinstriping was around 2200 inches. Day 2 ended about 6:00 pm, thank god. My body was killin me from the bending, stretching- just general fun having. But i still wanted to go home and play drums as loud as humanly possible, so i did. When I got in today I cleaned off the remaining baby powder (used to allow the hands to slide across the surface) and the Caddy looks awesome! The ivory was just the right color- gave it a real classic feel and really finished the scallops off well. The last remaining touch on them was to take a little brush and go inside the door/fender edges a little to make the overall presentation better and cleaner. Next up is the deck lid pinstripes!

Custom paint on the Cadillac (aka Cattle Smack)


This post is going to end up being broken up into at least 2 parts since i have a bunch of pics. Scott from the Frederick School of Rock brought me his 64 Cadillac to paint scallops on, pinstripe, then pinstripe some more. The car is fresh out if it's body and paint receiving today's latest and greatest- Flat Black. This is much too big a car to be blank... so the idea was to do scallops off the front end in panels (as opposed to painting the whole front end the scallop color) using a color called Chronic Green, then outline them with 1 Shot Ivory. The masking/layout process took 2 rolls of fine line, 3 roles of masking tape and several football fields of other materials. The green didn't cover real gracefully, but I kept at it until it was right. Once everything was unmasked the vision had started to take shape. But, nothing is complete without pinstripes, and this 64 Caddy is no exception.