

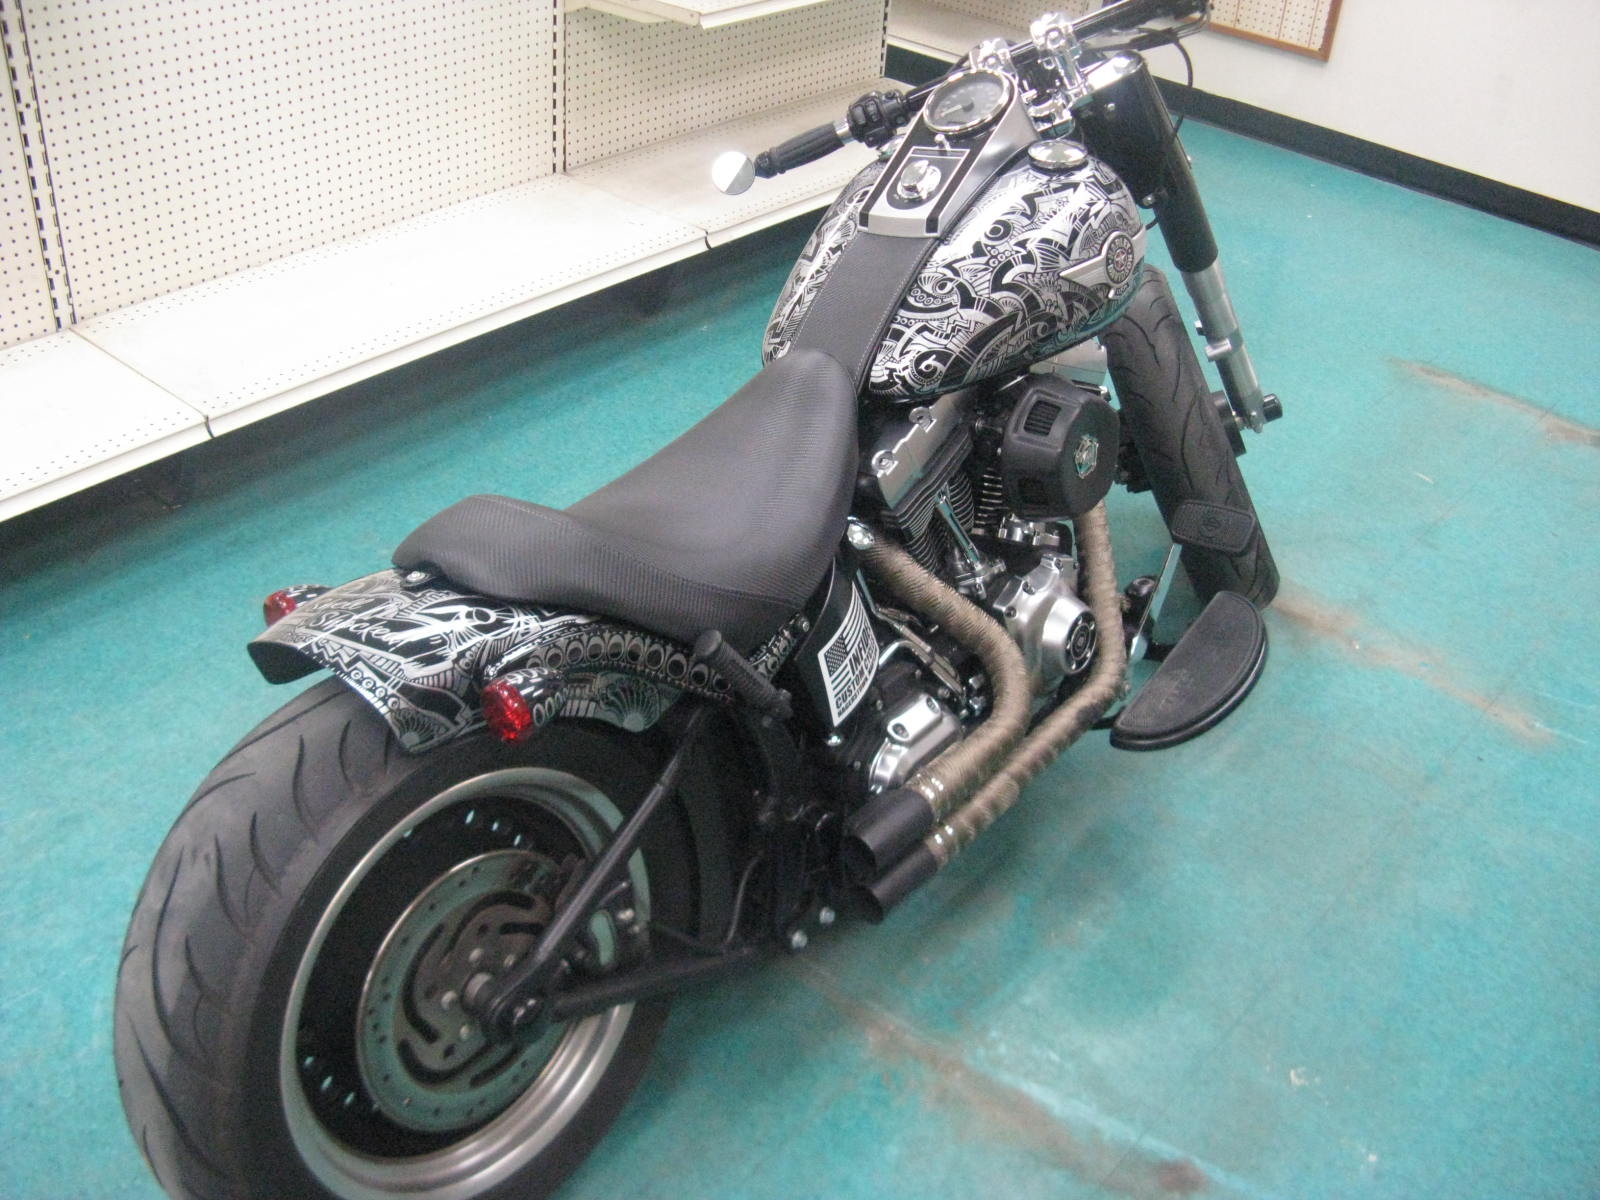


Where to start, where to start. So...... very very late last Monday night (roundabouts midnight) I was woken up by a phone call from Jason of Infidel Customs. The reason for the late night call was not actually to wake me up, but rather to commission me for a Sharpie paint job on his Harley Davidson. The catch (since there always is one) was that it had to be done in time for a Thursday photo shoot. That's 2 days to start and complete the job. And in reality, it was even less since my day job consumes all waking hours. The other catch was that it had to be done at the location of the new shop, and also done on the bike (instead of disassembling it first). So this was one hell of a task with a number of obstacles. Getting up to Hagerstown from Gaithersburg with enough coffee to keep me going was difficult enough... but I love a good challenge. The first night I arrived around 11 pm. I got 1 side of the gas tank done and 1 side of the rear fender... so 1/2 was a good stopping point for day one. I got home about 3:30 am. Day 2 I arrived a little earlier, closer to 9:30 pm and got around the other side of the rear fender and gas tank. Day 2 definitely went alot smoother and faster. And around 2 am I was done. Sleep deprived with a drive ahead. The bike was completed and it turned out freaking cool. Jobs like this are hard to tell how it's going to turn out exactly. You don't really know anything until you're done. Airbrushing and pinstriping are about the same way- You can envision everything, but until it's done you really have no idea. Free handed artwork tends to be like that. Risky. But that's the excitement in it. Not to mention the rather individualistic look when it's done.
This job was done using Silver Sharpie Markers over the existing gloss black. All the artwork was done freehand with no pre-planning what so ever. The materials I brought with me to do the job was a pack of markers and an Ipod to keep me moving though the late hours. These particular markers can be tricky to use for many reasons. Doing parts on the bike means you have to try and keep the marker always feeding downwards... which means you have to contort your body a bit to position yourself properly to get the markers to operate properly while maintaining nice lines. Also... after a little bit of use, the felt tips begin to 'break'... this leads to a change in line thickness and what's called 'pushing'. The trick is to pre-break the tips a little bit to try and keep things consistent from marker to marker.
These jobs are a blast to do. I hope to be doing more in the future!
Very slick Chris. I was scratchin my head when you said you were going to do a Harley, that bike & the sharpie job on it are made for each other. High five.
ReplyDeleteLooks pretty awesome. Do you put a clear coat on after the sharpie or is it just the sharpie and that's it?
ReplyDeleteThanks for the comments, dudes. In this particular case there is no clear coat over the Sharpie. Sharpie mimics the sheen of what's underneath it- so it's shiney on this bike, and it was flat on the Fiero. So if it looks cleared over it's because it's on a shiney surface.
ReplyDeleteHow much.u charge on somethin like that
ReplyDelete